A Scanner Orderly: The smart coaster
What if you could order drink with your coaster? This blog post explains how we made one using an Arduino and Node.js.
Arduino Source Code (BSD 3, with GPL libraries)
Node Source Code (BSD 3)
Team
Joe Coppola: Mechanical Engineer
Peter Gyory: Electrical Engineer
Will Paul: Software Engineer
Advisor:
- James Wagoner: Actual Engineer
Design Overview
A general problem with work is that we are often asked to put our mental energy towards multiple tasks at once. Often times people will say that they are good at multi-tasking, but research has shown that multitasking leads to severe bottlenecking in planning actions and information retrieval from memory.
Enter the bar domain, a common problem, especially for busy bars, is that the bartenders are asked to manage the ordering, making, and paying for the drinks all while managing a mental queue of what to work on next. This leads to long waits and a struggle to get the bartenders attention. Our idea is to automate the ordering and queuing process, with an eye towards the payment process, to let the bartenders focus on what they do best: make drinks.
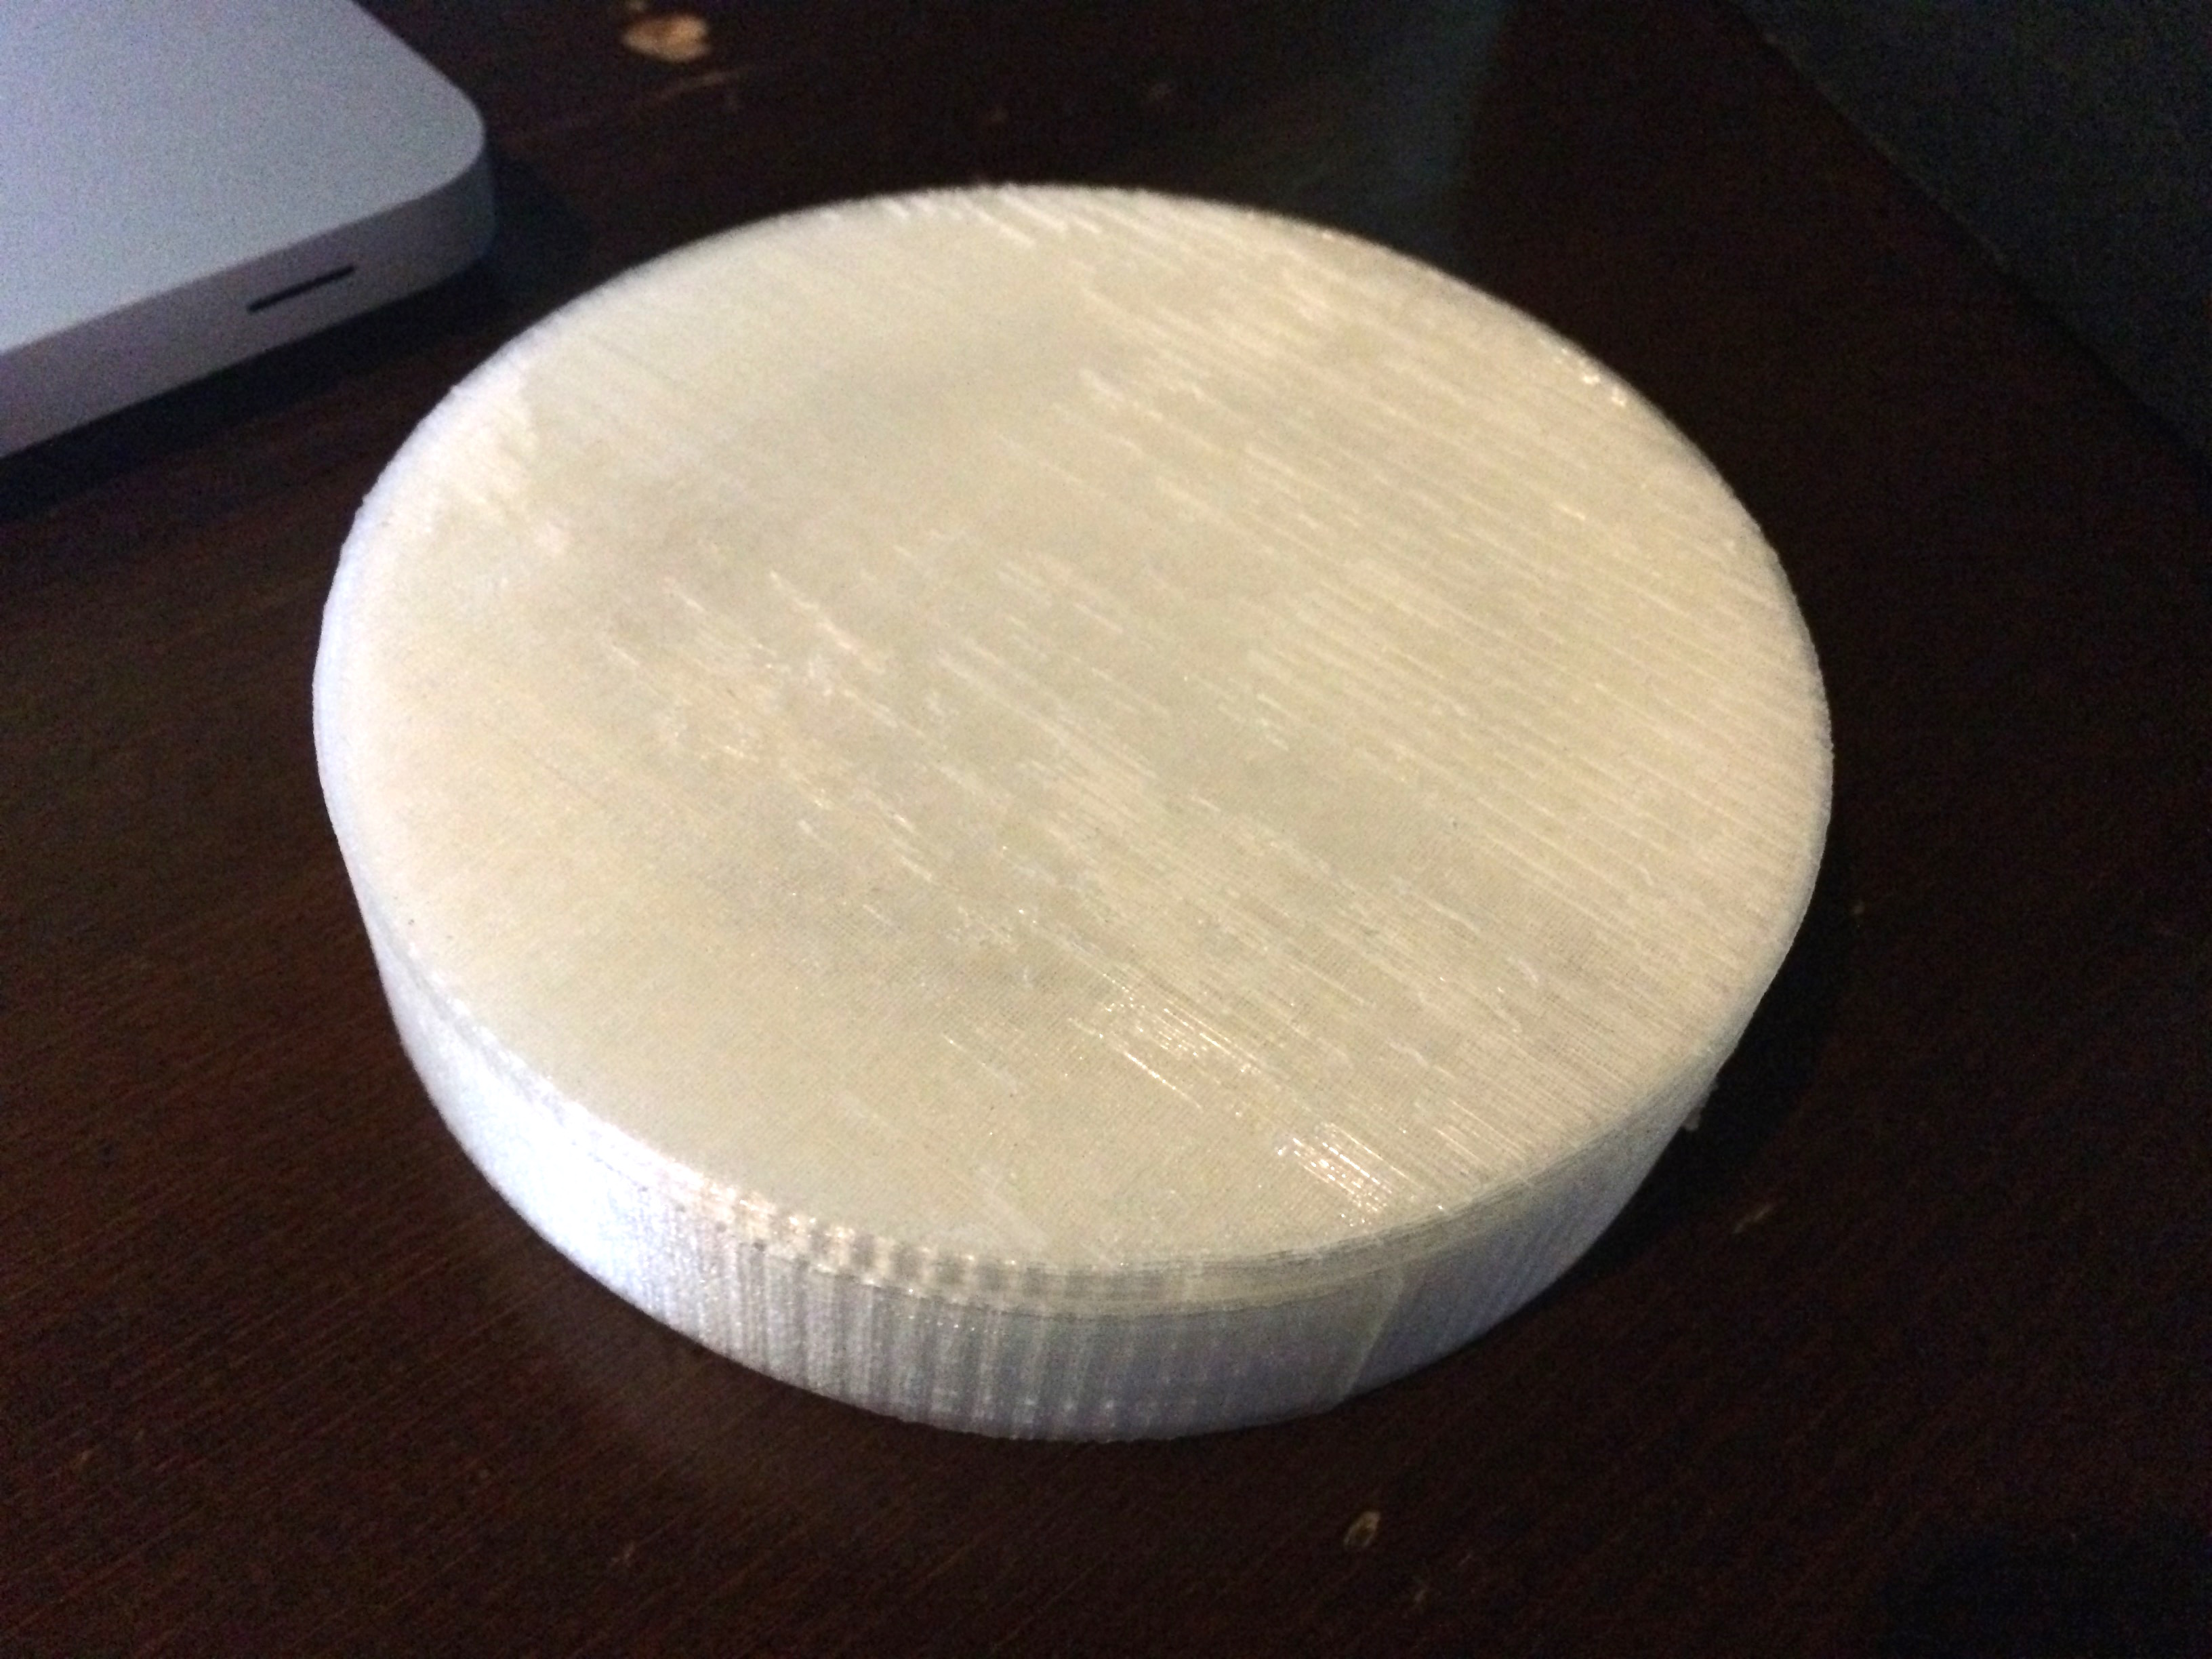
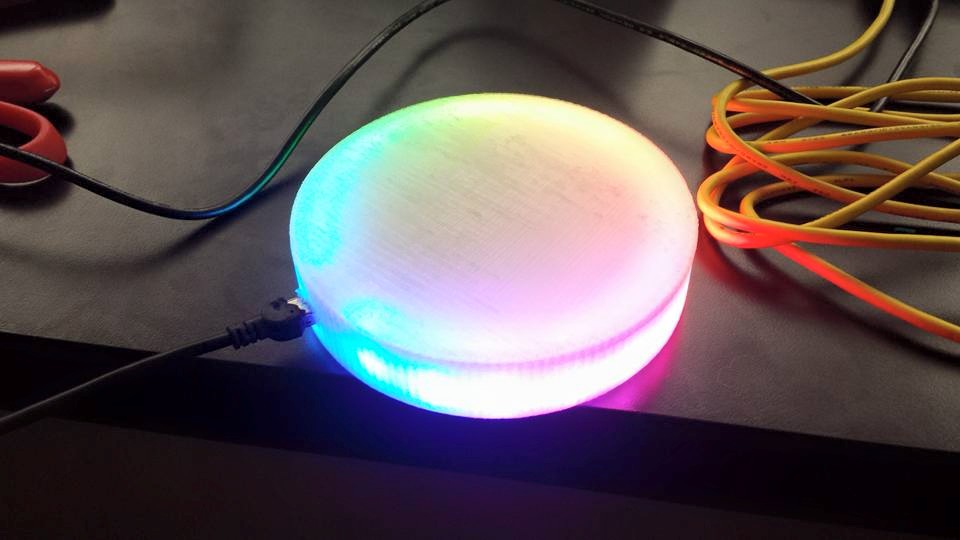
To achieve this we envisioned a smart coaster, which each patron would receive upon entry and would serve as their primary method of ordering drinks. Underneath the top of the coaster was a Force Resistant Sensor (FSR), which would allow the user to perform selection and detect when a drink arrived.Along the inner edge of the coaster a strand of LEDs were placed to give the user feedback on the state of their interaction with the coaster and the state of their drink. The coaster itself was 3D printed with translucent plastic so that the lights can shine through.
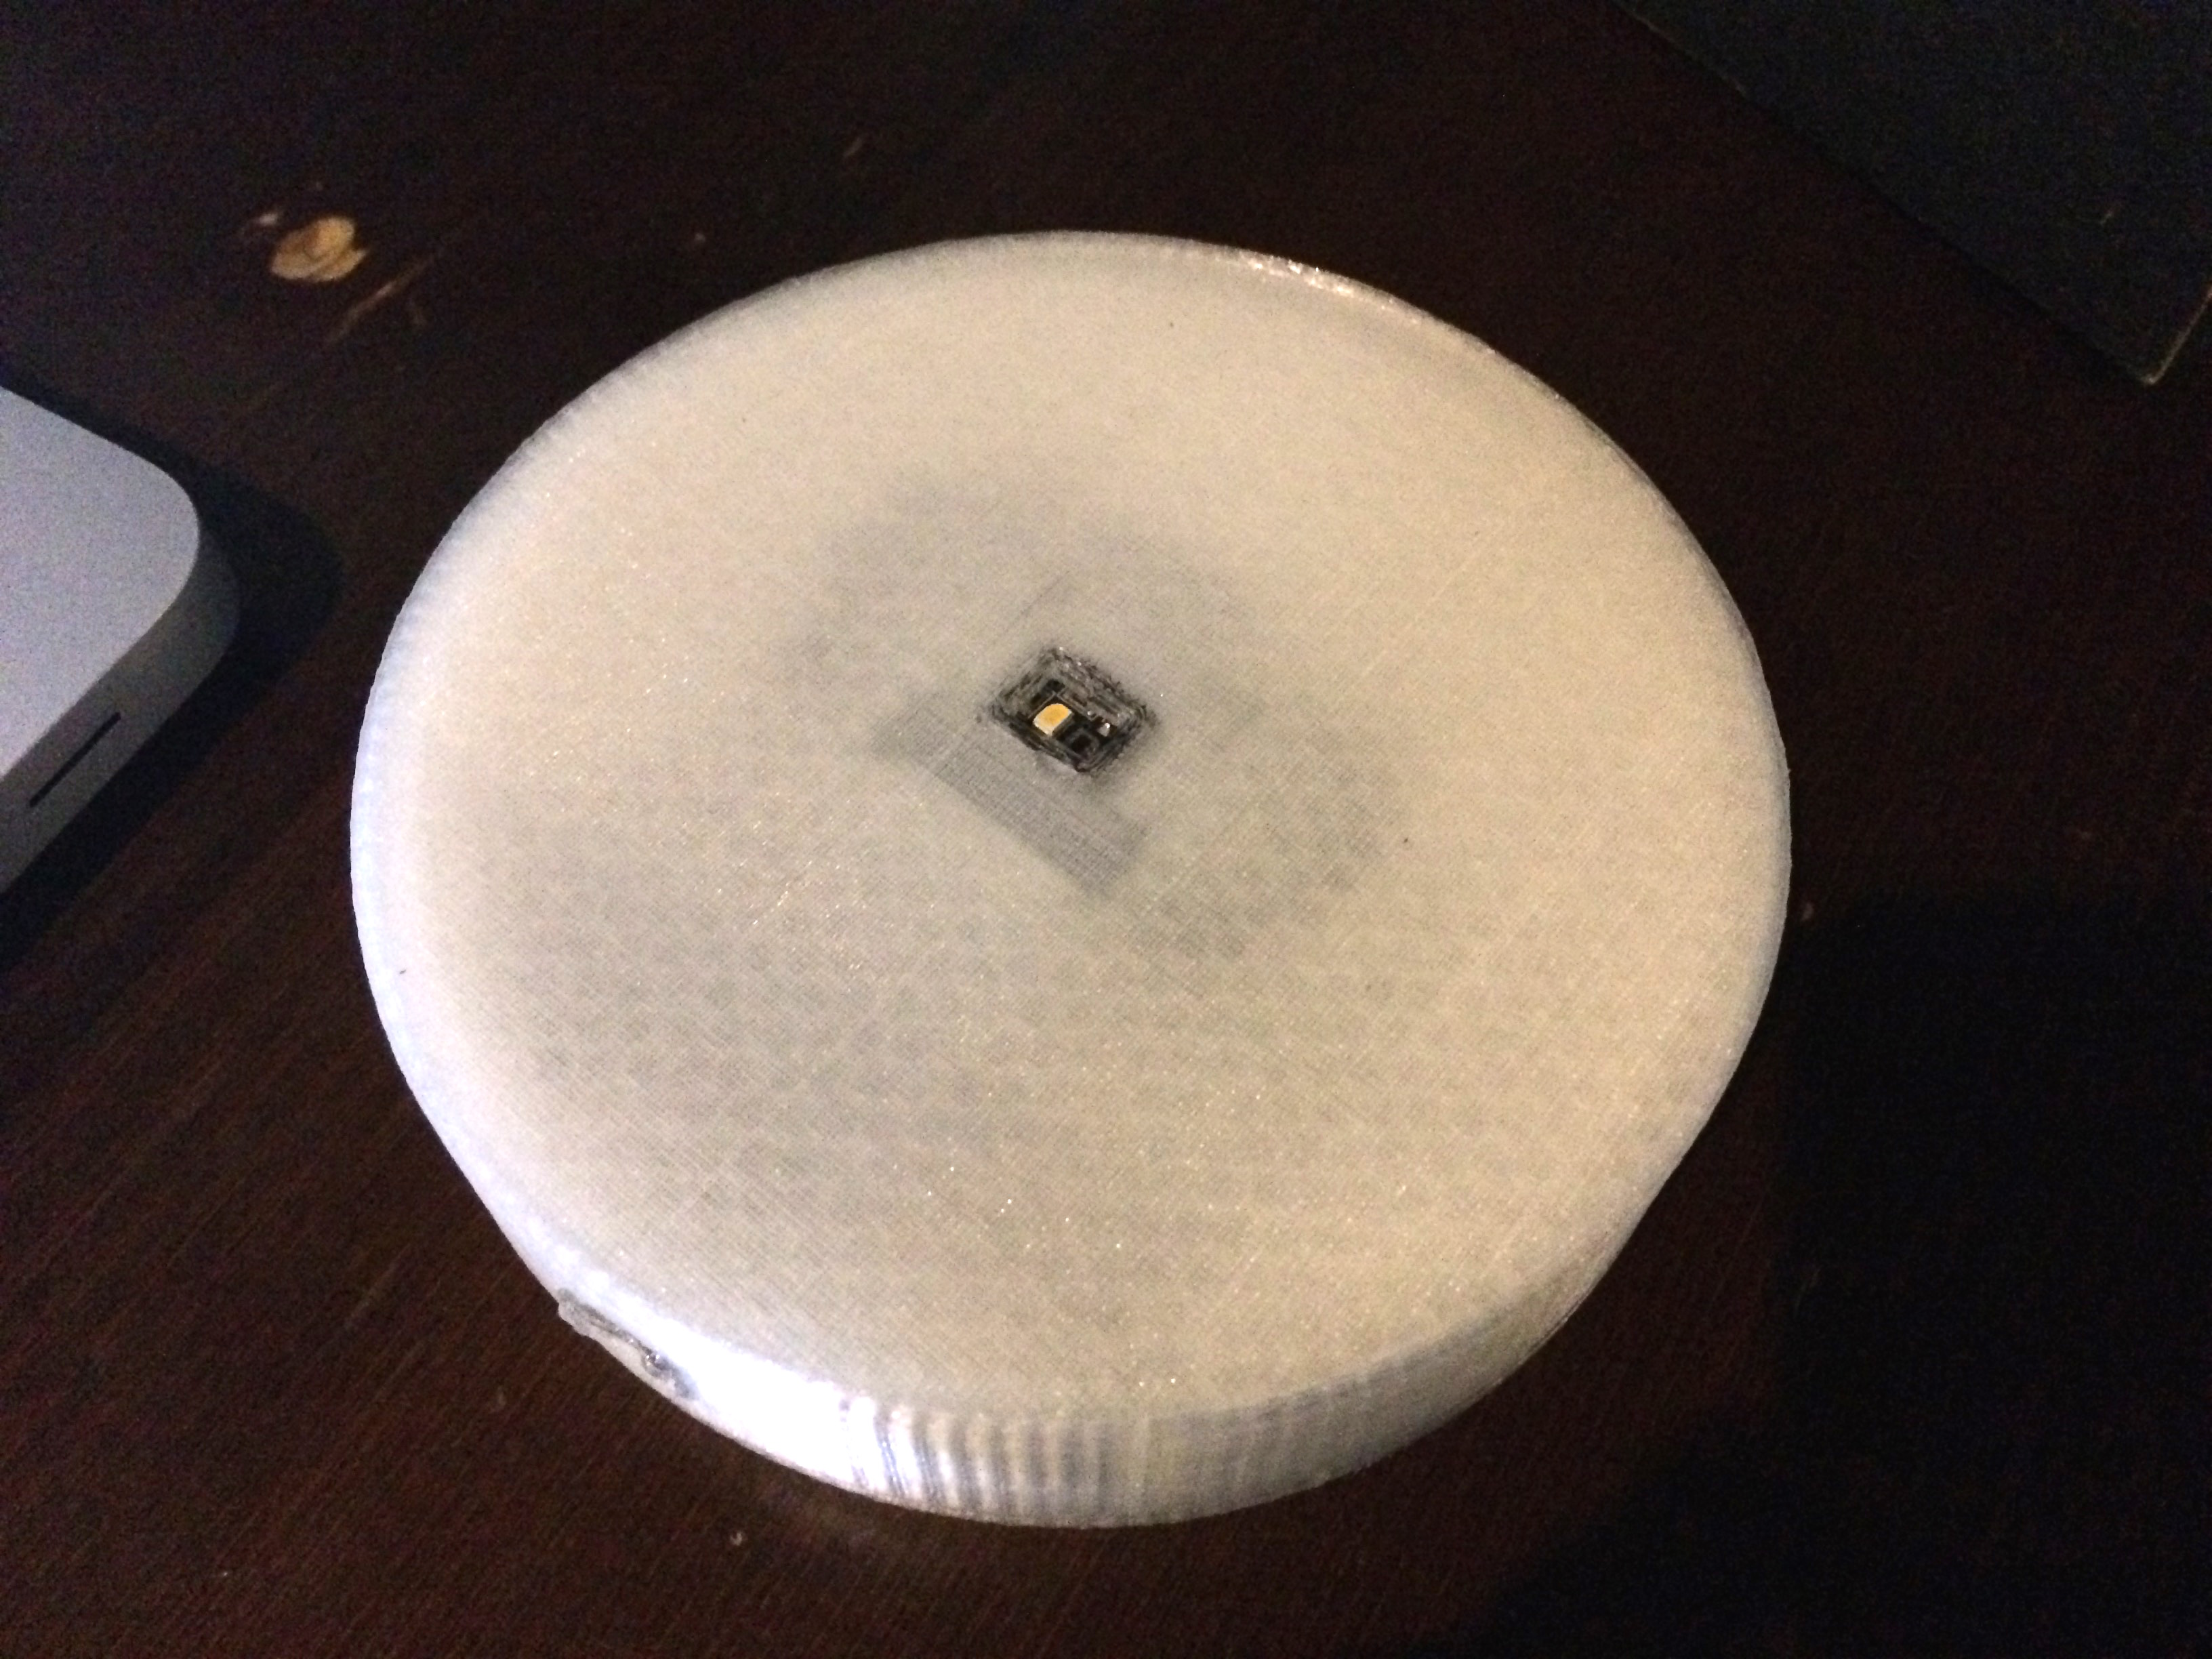
On the bottom of the coaster we needed some sort of menu reader. We looked into barcode scanners, cameras, RFID tags, but all were either too expensive or too bulky for our needs, so we ended up going for an RGB sensor to be paired with a color-coded menu. For this prototype we decided to limit the options to ordering Highballs, which are two-part mixed drinks composed of one spirit and one mixer. One benefit of the RGB sensor we chose was that it had its own light source, so it can work even in a dark bar. While the sensor was actually surprisingly accurate we decide to limit the menu to just 3 spirits and 3 mixers for simplicity.
Pics
Top of the coaster:
Bottom of the coaster:
Videos
Shows selecting the spirit from Will Paul on Vimeo.
Shows selecting the mixer and waiting transition from Will Paul on Vimeo.
Supplies
-
Small Arduino, we used a Flora
-
3 * 3D prints for the coaster
-
Adafruit RGB Sensor
-
16 Adafruit Neopixels in a strip
-
Stuff to make a Force Resistance Sensor, we used:
-
2 Sheets of aluminum foil
-
2 Sheets of laminate
-
1 sheet of Velostat/Polymer
-
-
Solder
-
Glue / Electrical Tape
-
Resistors / Wires
Construction
Inside of the coaster:
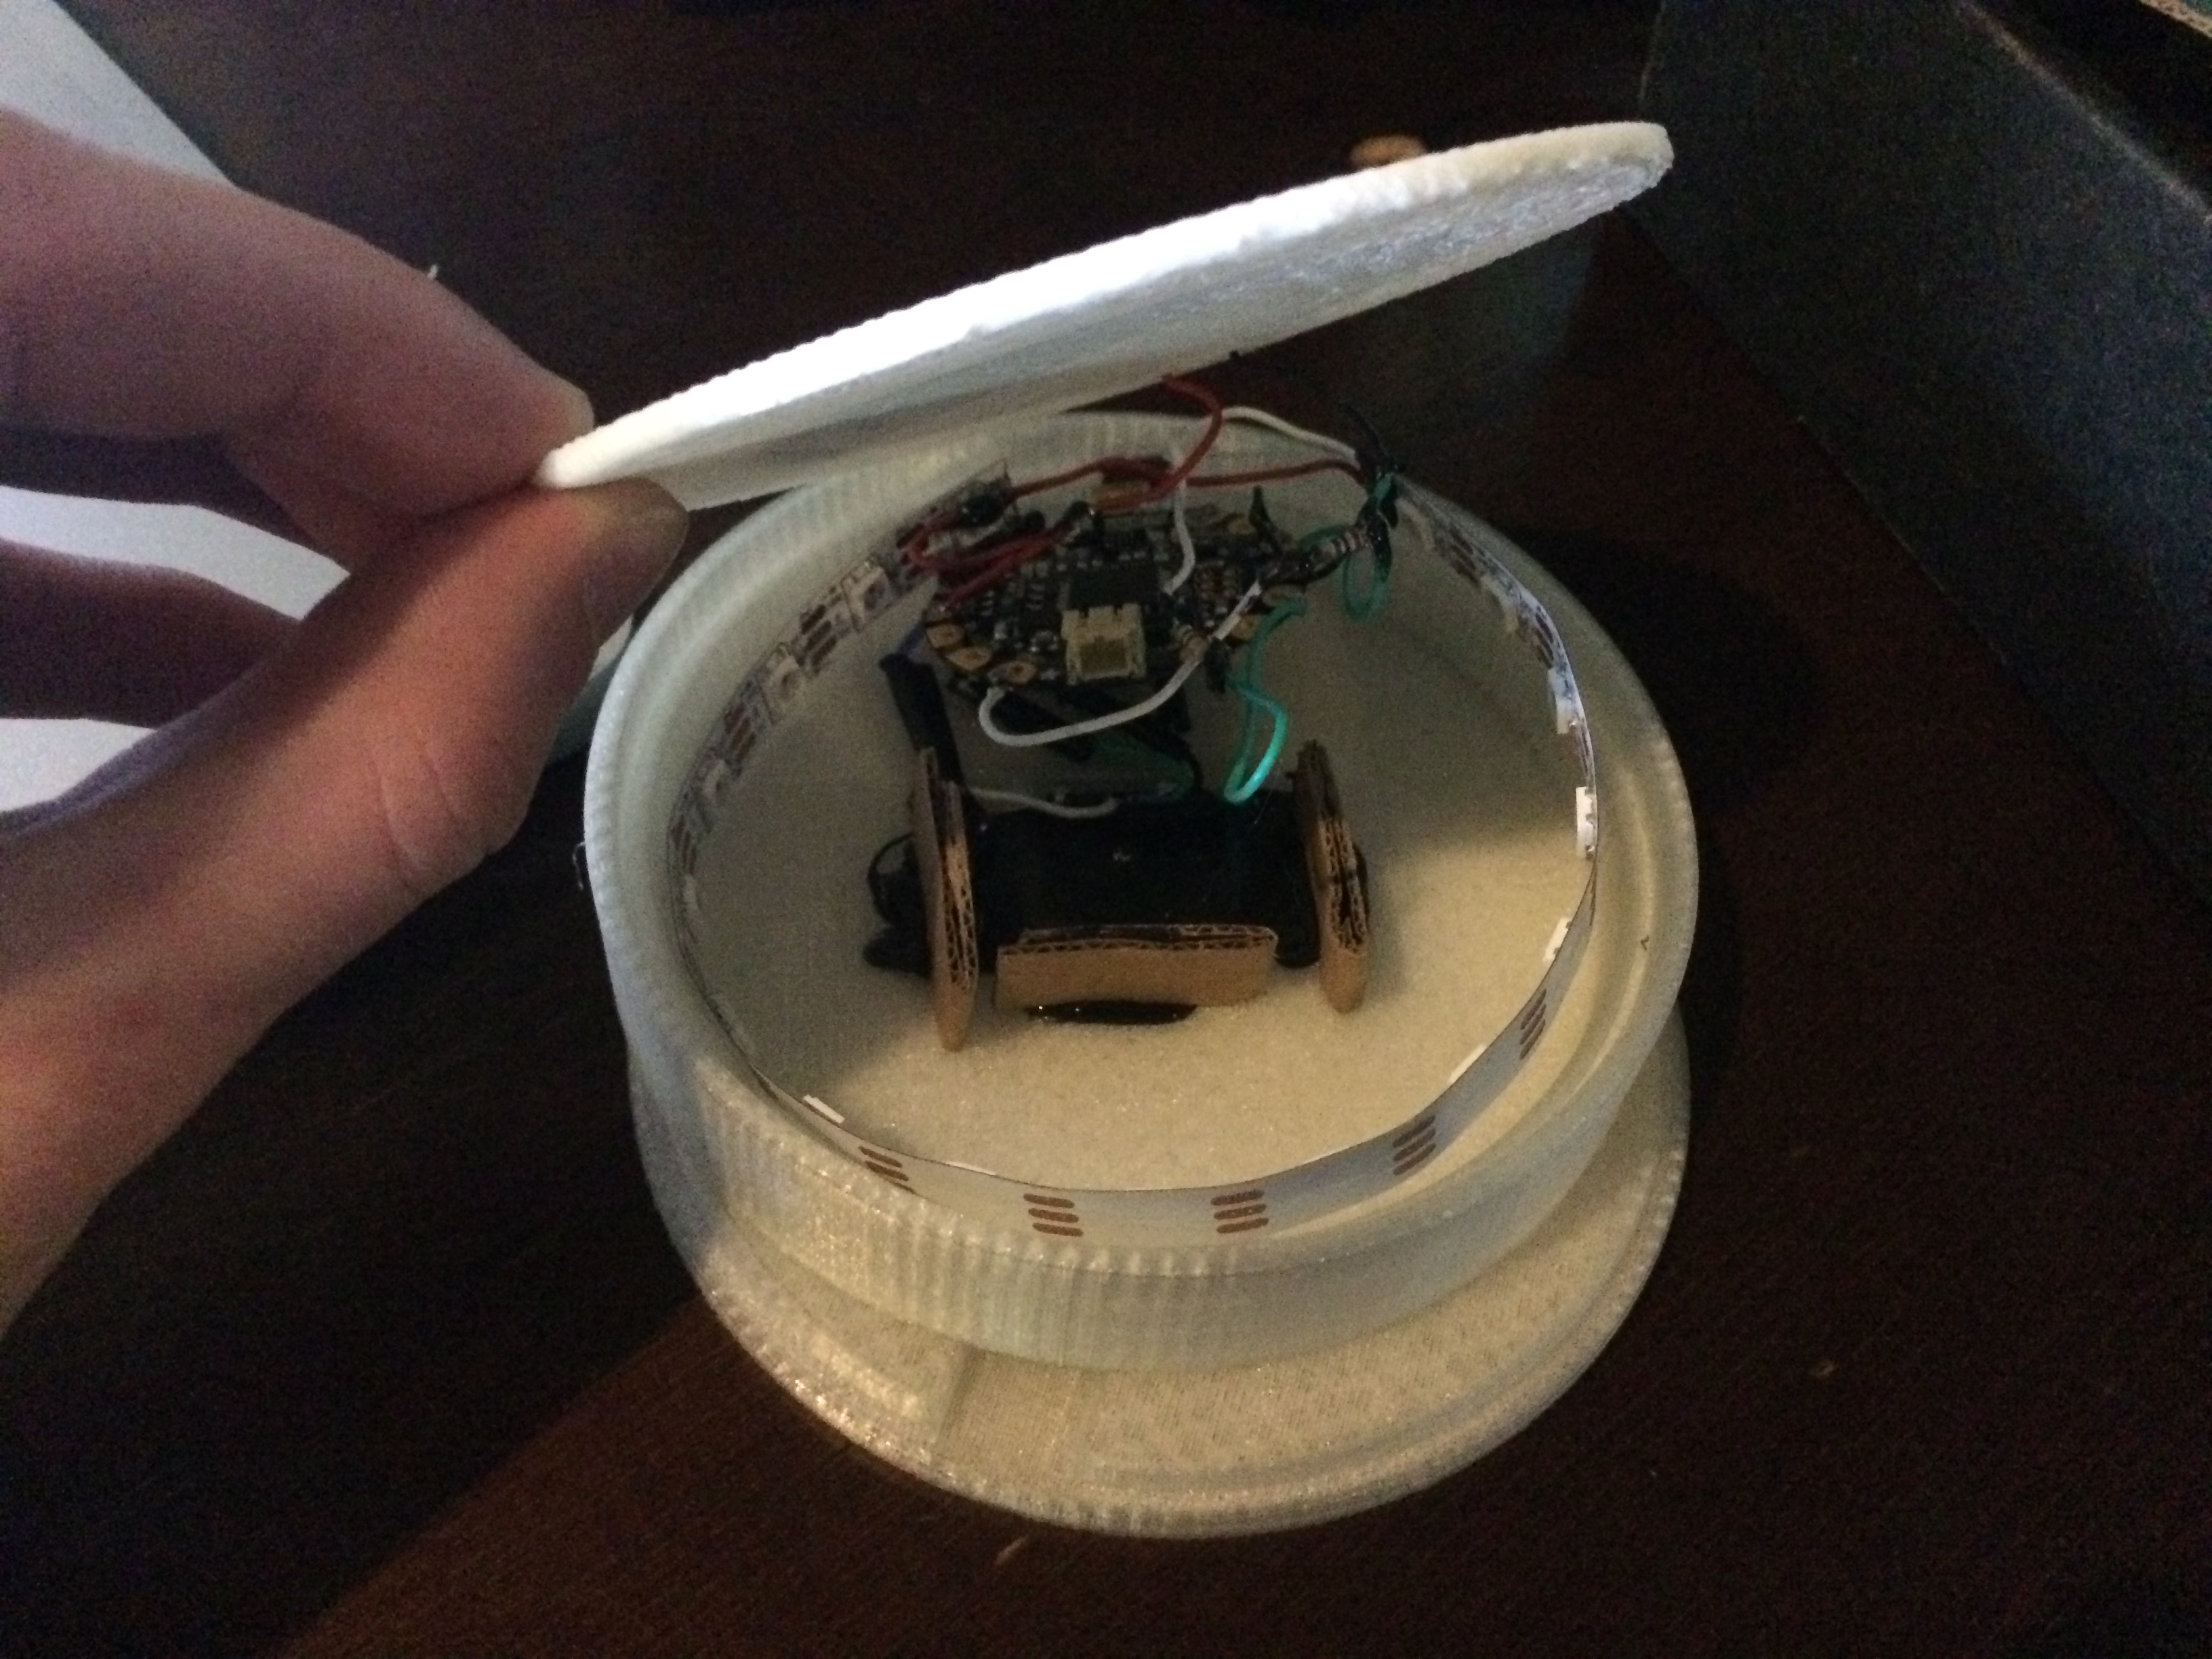
The coaster itself consists of three 3D printed parts, the bottom (which has the sides, a ledge for the other two parts just large enough for the strand of LEDS, and a custom fit whole/dip for our RGB sensor), the middle part (which was just a small sheet of plastic for the FSR to set on) and the top (which was cut to fit right on the ledge and a special cutout so that the wire from connecting to the FSR didn’t cause it to bulge). In the end we also added little bits of cardboard for extra support against the FSR (so that it would be more responsive), and this should probably be added to the print for future additions. Also the FSR ended up being thicker than we thought, so in future prints we would make that divot a little deeper so that it fits together a bit tighter.
All the internal connections were soldered and since there wasn’t really room for a breadboard all the circuits were made with just wires and resistors. To keep everything insulated we made extensive use of electrical tape and hot glue (for stuff that electrical tape wouldn’t stick to).
Code
We had communication in both directions between the Arduino (potentially multiple) and the Express Node Server using the Serial port and communicated between the server and the (potentially multiple) clients using web sockets so that the page didn’t have to be refreshed to display updates.
Arduino(s) <-> Node Server <-> Clients
         Serial         Socket.io
We used the Node serialport library to handle communication between the server and Arduino. It worked by polling the clients serial ports for any device that was sending the message ‘Connect’, which was what our coaster sends out until it gets the “$” sign response from the server (we chose “$” because it was single byte ASCII character that signifies end of string in Regex, so it seemed an appropriate way to close a message).
Since there is always a high possibility of data getting lost/missed in Serial communication we implemented a UDP-esque approach where we just keep sending the message until the receiver tells us they have received it.
Arduino <-> Server <-> Clients

# Sends 'Connect' until server responds
A -> S  "Connect"
...
"$" A <- S

# Sends a drink JSON string after the user selects their drink
# Sends until server responds
A -> S "{\"drink\": [0,0]}" -> C
...
"$" A <- S

# Send a message that the bartender has started the drink
"start" A <- S <- C
...
"$" S -> A -> C

# Send a message that their drink is on its way
"ready" A <- S <- C
...
"$" S -> A -> C

# Sends a message to the server that the drink has arrived
A -> S  "Done"
...
"$" A <- S
Conclusion
Obviously, a wired coaster isn’t going to work in a real world environment, but the proof-of-concept is there. With a Wifi module, a 5 volt Arduino (instead of our 3.3v Flora), and a small battery pack along with some slight modifications to the model we think it could work pretty well.